Monday, 2 December 2024

HiDraw / LoFade Pattern and its Repeatability and Consistency on Request. Correlation between set Pelvis and Levelled Knees and the Shape of the Shot.

No matter how consistent is a pattern it will never match all courses and all possible situations. One of the most consistent player in history of golf, Lee Trevino, with his great push fade could not be able to win The Masters at Augusta mainly because that beautiful course favours heavily drawing the ball. Ben Hogan, who desperately sought for eliminating his hooks, found a secret to play fades with a draw swing which was considered the biggest secret in golf. Mac O'Grady worked out a great set of patterns called a set of windows that should serve all aspiring juniors and pro golfers.

We are not in the league of these above masters in any case, however, our aim is to help amateur seniors and body-handicapped persons enjoy playing golf thanks to implementing as much automatism as possible to their actions. Therefore, having mastered the Controlled Draw Pattern and having an unlimited access to Trackman nowadays we have been thinking about an universal pattern for the majority of situations on golf courses that would be extremely easy and very consistent on request at hoc. Hence our idea to have a pattern consisting of only two subpatterns (that in our opinion are the most useful from all), namely low fades and high draws.

We are not going to guide you through the meanders of the D-Plane and old vs. new golf ball flight laws as this knowledge is videly available in the net; we are going to give you a short and not complicated receipt how to be able to play these two subpatterns using the same pre-shot routine. Since the draw swing is the most natural and because we were working almost exclusively last years on the Controlled Draw Pattern, we are a bit hoganesque biased and treat fades as just anti-draws. We shall explain it later on, now let us concentrate on main pre-swing factors used in both subpatterns.

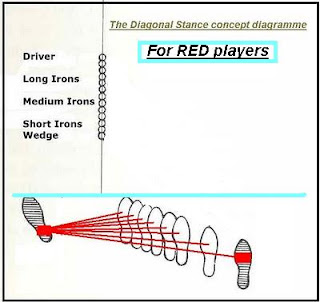
In both subpatterns we use the Diagonal Stance that we consider as the best option not only for golfers but also for other human activities when force vectors are directed sideways; what differs the LoFade and HiDraw subpatterns are the ball position and orientation of knee leveling procedure which is of key importance.

For HiDraw subpattern the ball position is like on improved version of Ben Hogan's 5L diagramme (in fact, two diagrammes -- for LED and RED persons:


The hips are being set open to the baseline, however, the knees have to be levelled as for the Controlled Draw pattern, i.e. the line is slightly closed in relation to the baseline (please revert to the "The Knee Flex Leveling Procedure [...]" article). In short, the lead knee is being bent more than the rear one.

Everything, i.e. the whole motion starting from the Trigger Compression phase is unchanged. In case one struggles with hitting draws please revert to the whole series dedicated to the Controlled Draw Pattern articles.

For the LoFade subpattern we need to move forward or to leave the ball back in the stance because it makes the path of the swing more outside and allow to deliver more open clubface to the ball; one the best illustration is what already mentioned Lee Trevino, himself playing predominantly push fades, was doing before starting the swing -- he moves forward both feet in his special way shown below: 


With the ball back in the stance we obtain lower trajectory and  relatively bigger easiness to find a spot to hit the ball while having a short flat spot while the shape of our swing is more similar to the letter V than to the letter U (that is present and desired thing when playing a controlled draw).'
As regards bending knees we need to bend the rear knee joint more which is opposite to the knee action in the HiDraw pattern. Thus, the knee line is levelled in an open manner corresponding to the fade outside-in path. 


Please take a look on the diagrammes below:


Basically, this is it. The idea will not guarantee 100% repeatability plus typical for human beings  instability in delivering the clubface angle may end up with bigger or smaller draws and fades (or even pushes instead draws and pulls instead fades), however, on amateur level it appears to be relatively highly repeatable method that allows us seniors and body-handicapped golfers play all golf courses with high draws and low fades almost on request. It is a great feeling when we can see our shots go as planned, a true enjoyment of this great and difficult sport.

Wednesday, 10 January 2024

My Golf Resurrection. Controlled Draw Pattern and the Practice Swing enhancement for the OTT from Inside Approach.

 It has been just more than a year since my beautiful light went out. Months of the 2023 year were passing like weeks, weeks like days, so fast it is all happening, like I wanted my end here to become as soon as possible. I lost my nerve to think about golf almost completely, I stopped to to read books from my library, I stopped to watch swings of famous players and I stopped to think about my amateur studies....

However, suddenly it has dawned to me that it would be unfair to everyone, including my Dear Wife to end this blog that way. I said to myself that my miserable existence should still include giving something to the world even if it is so insignificant as my amateur theories for golfers. I have been recently slowly but steadily returning to golf, even enjoyed few Trackman sessions with my Son. To my great content it appeared that my swing, although very rusty, is still consistent and timing-proof to a degree, so to speak. Of course I used my Controlled Draw swing, as this was what I was working on as the last pattern before the break.

Funny thing, I was never a fan of practice swings before hitting balls. What is to be stressed here, this practice swing makes the late inside approach in the following swing (see the picture below) practically automatic. Unfortunately, it does not make the angle of attack of the clubface automatic, however, it is entirely compatible to the long flat spot concept and the horizontal AofA of the whole clubhead is not that fat away from 0 degrees. 

Furthermore, practice swings might be a precious link between the address and the waggle and the real swings. As you might remember, we have never dealt with the issue of setting up too close or too far away from the ball. It has dawned to us that the closer you set up to the ball the less are the chances of swinging from the outside as there is no time for an excessive opening up of the body in a rotational motion. It somehow forces the shoulders girdle to stay closed while the whole torso is opening which makes the draw swing even more automatic. Please look at the diagramme below:


The green spots are just bottom ones of swings depending on how close we are from the ball (of course in exaggeration). Notice that the closer we are not only the longer the bottom spot is (we have explained this in detail in the articles devoted to the Flat Spot Concept and Phil Rodgers) but also their location and direction is very different. Why it is like that ? Because when we try to swing very closely to our feet we shall hit the ground much earlier than in case we hang out to reach the ball. It is just a perfect scenario for our practice swing -- to swing between the ball and our feet while having adressed to the ball before and without changing neither our feet nor our joints' presets and just following it with our true swing.

Imagine two middle green spots for a better understanding -- the lower and right one symbolizes our practice swing while the upper and left one is our true swing:


Do not be afraid to hit the bottom near your rear foot -- in fact, it should be done that way.  The only one thing you should monitor is how this hit looks like. The clubhead should pass the ground smoothly, never sharply, like the flat spot is really long despite the location. Make two or three practice swings until you can feel this long flat spot. Then proceed to place the clubhead behind the ball and simply make a swing. You will be amazed how easy is to play a gentle draw.

Last but not least, one word of caution. You must not stand too away from the ball just to allow to make a room for this practice swing (mind you, your feet do not move after the practice swing) as this make the whole process useless and you will stand too far away from the ball in result which rather disturb your desire to play draws. You should address the ball standing as close to the ball as it is comfortable for you and despite this you will have plenty of room for your practice swings. Your unconscious mind will take care about everything and you will not hit the ball accidentaly. This is how it looks in action (with both an iron as well as with a wood)...:


...and the whole actions:


Saturday, 12 November 2022

Anna

My Dear Wife has passed away after a long horrible disease. My whole world has crumbled into a million of pieces that will never match again. See you in the afterlife after a half-second of eternity, My Biggest Love of my life.


ANNA MARIA JĘDRZEJEWSKA  (29.01.1964 - 4.11.2022)


Through hazards of fate

And roughs of reality

Our lives we do play

Onto greens of eternity


Play on, friends, do not wait for me. I need a rest.

Saturday, 19 March 2022

The Knee Flex Leveling Procedure for the Controlled Draw Pattern. Draws, Fades and Mac O'Grady's Wisdom.

Winter is always a good time to learn from others and rethink own theories. It is worth underlining that we have never been dealing with the flexion of knee joints before, mainly because it is not possible to apply the theory of natural limitations in this action. However, in view of our previous important discoveries concerning the Controlled Draw Pattern, as we have been always thinking about making the swing even more automated, we can now apply our newest findings. There is no automation big enough for an imperfect human being, mind you all.

We have been lucky to find recently quite a lot of tremendous YT vids about Mac O'Grady philosophy (published by several of his former students * -- obviously the content is not that prohibited any more as it was before). In several ot them, Mac stresses the importance of feet positioning and corresponding to them actions of knee joints during both the backswing and the downswing and it got us observing and thinking. Also we have just lately seen an excellent vid from a lesson Mac gives to one of his students about methods of playing the draw where he explains how to do it (by the way, nothing revolutionary here for us -- diagonal stance, closed alignment, bending the plane line, delaying the rear shoulder's action, slowing down the pivot during the downswing, increased secondary axis tilt, wide lead side at impact, etc., therefore, nothing that could help us in what we have already proposed with the Controlled Draw Pattern). Anyhow, this draw swing itself is simply beautiful:


What has drawn our attention then ? Not the very amount of the knee bend, as we knew that Mr. O'Grady liked to bend his knees a lot -- however, the increased amount of bending of the lead knee while still having the hips open ! We have to remember that if we want (in our Controlled Draw Pattern) to have hips open to the baseline while having an increased axis tilt and the legs wound up targetwise --  the amount of the lead knee flexion is practically always not biger (and sometimes smaller) than the rear knee one sort of by default. See below:


As we shall see later on in this article, the author's draw swing motion is being a bit stymied by the knee flex type that should be used for fades (not a big surprise for me as when I was younger and healthier I worked on fade patterns almost exclusively). We started to implement a correct knee flex leveling procedure for draws a'la Mac O'Grady and the results are tremendous. It automatically helps to deliver the clubhead from the inside and eliminates some errors that appear occassionally as e.g. throwing the clubhead too much to the outside that can end with heel shots or shanks, especially when trying to hit a powerful shot. What is also great -- it does not worsen the conditions of obtaining the long flat spot, despite some concerns from our part as we know both from Phil Rodger's as well as from our own experience that no excessive knee bend can be not good here.

Observe how Mac adjusts both his lead knee flexion as well as position in relation to baseline and pay special attention that he appears to bend the lead knee more than necessary (for a draw only, mind you):


Let us quote here 'The Stack and Tilt Swing' book: "Players who swing too far out to the right have a tendency to flex the right knee too much on the downswing. As the club comes down, your right knee should flex from its straight or nearly straight position at the top, but it should never flex more than it did at address". And later the authors suggest the following fix: "Set your right leg straight at address and keep it straight throughout the swing [...]". Of course the first part meets our approval as we do prefer always to have a setup-dependent swing motion -- we have developed our special procedure for our Controlled Draw Pattern to which it is very easy and natural to implement the knee flex leveling  procedure.

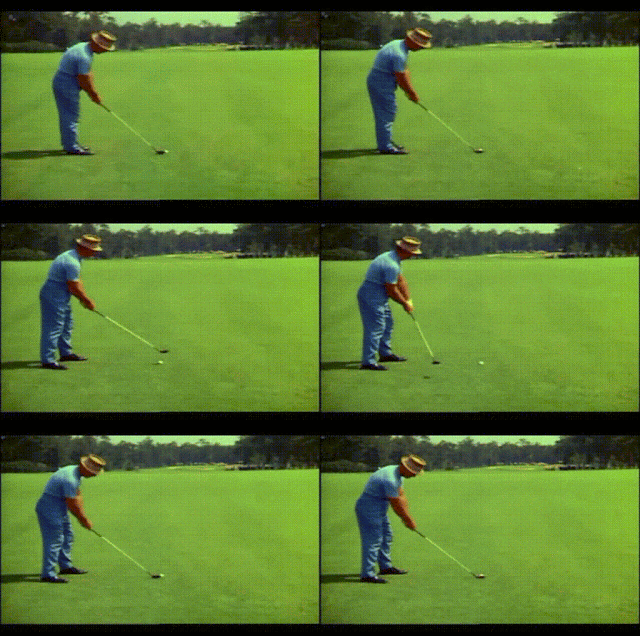
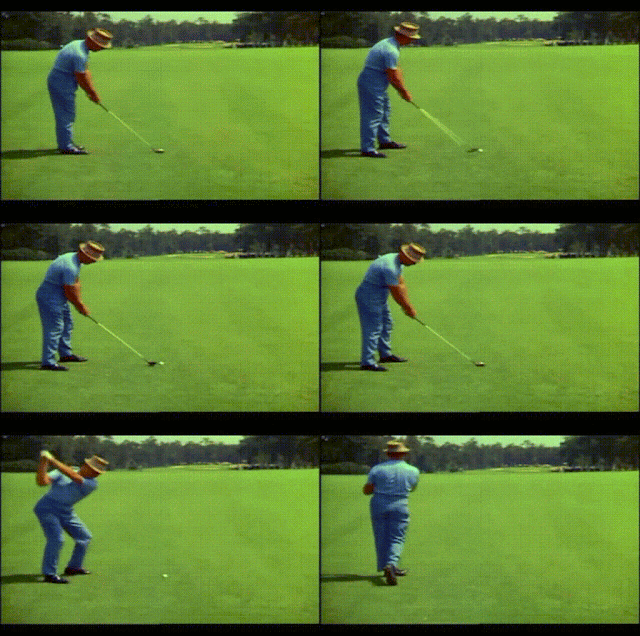
For a better evaluation watch also someone as significant as Sam Snead preparing for a draw during his Shell match against Ben Hogan; observe carefully the whole set-up procedure of this master and pay special attention to his version of the knee flex levelling procedure...:


...and his whole beautiful swing motion:


The very procedure can be easily implemented into the procedure of creating the diagonal stance. My own simple one in our Controlled Draw Pattern is somehow similar to Mr.Snead's one and consists of the following points:

- standing parallel to the target line with feet together and the ball in line with the right foot;

- instead serious withdrawing the rear foot to the South-East we rather use both feet; first, we place our lead foot to the North-West (the amount depends on how big a curve we want to play); it will automatically create the necessity to flare out the rear foot (sometimes even withdrawing it slightly especially with longer clubs) so that we could adjust our head, body and knees with that new baseline created by our feet; note that the ball position is now in the middle of the stance no longer in line with the right foot;

- when the rear foot is flared out we can perform our correct default taking of the diagonal stance with all usual elements with presetting of the rear ankle and rear knee; what is worth reminding it is not possible to bend the rear knee too much in a preset condition;

- we introduce now the levelling of the knee bend starting by flexing of the lead knee so that it matches the draw pattern baseline while having the hips line slightly open to it (because of the diagonal stance set-up followed by the winding of the lower body a'la Abe Mitchell);

- we do not forget about establishing the pronounced primary axis tilt which makes us see the ball even more forward (see the article titled 'Gaining the Setup Automatism in the Controlled Draw Pattern. Finally a Bliss for RED Golfers');

- in fact, our concept procedure is a mix of Snead's and Trevino's; if you remember, Trevino (who played a push fade) always moved forward by a step or two before starting his motion; we do not move forward but just use lead feet more than Snead did.

See it below in sort of an exaggerated mode:


 As Percy Boomer wrote very wisely in his book 'On Learning Golf' -- "The difference between the good and the oridinary golfer is that the good one feels his shot through his address." I am not a good golfer in any case but I can tell you that I started to feel shots through my knees' position at address -- when my knees are being levelled for a draw, I feel my shot will be a draw. What is interesting, I have never felt it before so clearly. It is a great feeling.

And now we would like to present to you all the comparison of Mac O'Grady playing fade (left) and draw (right) in three crucial stages of the swing motion; please pay attention to the following aspects in the coronal plane (DTL view)...


...the lead knee not visible (left) while it is visible (right) -- the essence of the knee leveling procedure despite the classic diagonal stance in both cases...

...the back of the lead thigh already visible in this stage (left) while not visible (right) -- and, of course, a difference in the degree of  the upper body closure, a bigger gap between forearms, a difference in the clubhead position, etc....

...impact position is a natural and automatic consequence of the previous one; it is very easy now to imagine what was the path of the clubhead from the previous position resulting in a small controlled fade (left) and a small controlled draw (right).

Professional players and professional teachers would certainly mention many more things when playing and teaching how to curve shots. Opposite to them we have always been concentrating on achieving straight as possible shots in an automatic way. Our work on the Controlled Draw Pattern for senior and body handicapped golfers, however, demanded some work on this subject though -- and the result is great, in our opinion, if one is capable to control the shape of shots just by proper aiming and the knee flex leveling procedure. It is simply plain, easy and efficient.


 *  I sincerely recommend John Dochety's and Kevin Ralbovski's YT channels.


Monday, 24 May 2021

The Golden Axis in the Backswing Phase. The [Radial Extension - Ulnar Flexion - Radial Extension] Sequence.

A natural consequence of finding excellent application of the Golden Axis in the downswing phase is verifying its usefulness in the backswing phase. This urge is being certainly enhanced either by opinions of such greats as Johnny Miller or Nick Faldo researches of such genial theorists as Mac O'Grady who all recommended the so-called early set of the wrists. For instance, Johnny Miller writes in his great book 'Pure Golf': "The early cocking action sets up the late release. But equally important is the fact that wrists have to cock somewhere and, when they do, they must cock without disturbing the angle in the left wrist. Otherwise, the clubface will not be maintained in a square position. It is not only more natural to set the hands early. it is frankly far easier to do than the late cocking since the club is still in front of you in the early set and the club is traveling so much slower at this early stage of the backswing than toward the end of the backswing."


While we surely appreciate the afore-mentioned points and gladly neglect Miller's lack of anatomical know-how, we rather prefer to concentrate on channeling the clubhead momentum through the Golden Axis of the lead wrist as the main goal that leads to eliminating redundant rotation of forearms not responding to the clubhead's CoG momentum. This is especially important as excessive forearm rotation gives the feeling (and in fact provides it) of accumulating power during the downswing phase. It brings some problems as well -- first, sucking the clubhead too low and to the inside too much (it is difficult to remain on this plane later on) and secondly, jeopardizing the clubface stability (that might have serious repercussions when fighting for the clubface stability in the wide impact zone). Of course some procedures as e.g. Scapular Plane Humerus Takeaway may vividly help but will not eliminate all possible errors. One thing is very important and we are in a full accordance with Johnny Miller -- the earlier the wrist acts the smaller are the chances for forearm rotation to occur. Let us show the comparison of the author's swing without (left, white shirt) and with (right, dark shirt) Golden Axis backswing below:


Biokinetic sequence of momentum transfer throughout the whole swing motion along the Golden Axis of the lead wrist is then radial deviation coupled with dorsi flexion (a good abbreviation would be 'radial extension') at transition it starts to transform gradually into almost full ulnar deviation coupled with palmar flexion (a good abbreviation would be 'ulnar flexion') approaching impact and then it transforms again into radial deviation coupled with dorsi flexion (i.e. into 'radial extension') after separation. A very good validation of this sequence is the fact that if, theoretically, a man would like to mimic a golf swing with a very heavy object (say, a spade) using a golf grip he can do it relatively easy without losing balance with this sequence only. The conversion into 'ulnar flexion' during the downswing phase does not happen at transition otherwise lag angle is lost momentarily -- mind you, palmar flexion reduces radial deviation inevitably. Therefore, it happens automatically late in the downswing when momentum is too big for the wrists to stay in 'radial extension'. 


 It is to be pointed out that the rear hand can be of a huge help to secure the Golden Axis of the lead wrist during the backswing phase but only when the rear wrist can also act more or less on this axis. It is possible with the Bio-K grip, i.e. when both hands are in natural position on the grip (and not in a parallel opposite position as many teachers recommend because it would force one of the forearms to rotate in order to accomodate). In this scenario, a golfer can concentrate on guiding the momentum via both wrists or even via the rear hand if one is accustomed to the rear side backswing. This backswing biokinetic sequence could be described as gradual transformation of a tiny 'radial extension' of both wrists established at address into a full 'radial extension' of both wrists at the top (maximizing all angles while maintaining the rear hand in the 'holding tray' desired position). Then from the top, resulting from the change of the orientation during the transition, clubhead momentum shallows the plane neutralizing full 'radial extension' of the lead wrist while maximizing it in the rear wrist. Please see a beautiful angle of the Henry Cotton's transition below:


The Golden Angle address universality is also worth underlining. Since some golfers prefer to have high hands at set-up it means that they are more on the 'ulnar flexion' side while those who prefer low set-up of hands (as e.g. Mac O'Grady advocates) have their lead wrist already slightly 'radially extended'. The lower hands' position appears to be better as the angle has already been established in right direction and there are practically no room for any redundant forearm rotation to occur, however, high hands at set-up can be offset by their more mid-body position. When we compare Mac O'Grady's low 'y-shaped' position (the so-called 'impact fix') with Ben Hogan's high 'Y-shaped' mid-body one we can easily see that both make sense. However, if someone prefers a low 'Y-shaped' position or a high 'y-shaped' one will meet certain problems in reaching optimal Golden Axis channeling process.


Friday, 5 March 2021

Control Enhancement in the Controlled Draw Pattern. Channeling Clubhead Momentum via the Golden Axis.

Wrist is the most mobile joint in the whole human body. It can flex, extend, deviate and perform all possible combinations of these motions. When we add also the pronation and supination of forearms it appears that our hands can move in practically all directions. In view of this fact wrists can be seen as chains in between nunchaku sticks joining forearms and hands gripping the club, hence joining practically arms and the clubshaft. This notion is very important for those who believe in lack of conscious actions in this area of the body. Let us remind here the famous quote from Ben Hogan's '5 Lessons' book:

THE ACTION OF THE ARMS IS MOTIVATED BY THE MOVEMENTS OF THE BODY, AND THE HANDS CONSCIOUSLY DO NOTHING BUT MAINTAIN A FIRM GRIP ON THE CLUB. (p. 82 of the book)

Mr.Hogan was of course right, as almost always. But the biokinetical truth is more complex than that. Our wrists are capable to both deviate in both direction (cock/uncock) and flex in both direction (hinge/unhinge); moreover, there is a coupling between these action described in our 'Omnium Trium Perfectum' article, namely that the most usual movement of the wrist is one of dorsi flexion (extension) combined with radial deviation, and of palmar flexion combined with ulnar deviation. Pure palmar-dorsal flexion (flexion-extension) and radial-ulnar deviation are movements that rarely occur in a straight plane. It is like that because when we want to maximize ulnar deviation range we unintentionally bow the wrist which means we flex it palmarily; conversely, when we want to maximize radial deviation range our wrist becomes dorsally flexed. It should give us the picture that the axis of wrist deviation RoM is not parallel to pure deviation motions but is slanted from slight palmar flexion to slight dorsal flexion just as shown below (we shall call it "the Golden Axis"):


Please note what scientifists wrote (https://www.ncbi.nlm.nih.gov/pmc/articles/PMC3260558/) : "The earliest notation of the functional use of conjoined wrist motions is attributed to Fisk, who noted the association of wrist extension with radial deviation and wrist flexion with ulnar deviation “when someone is casting a fly, throwing a dart, or conducting an orchestra.” Palmer et al showed that many occupational activities, exemplified by hammer use, involved an arc of motion from radial deviation and wrist extension to ulnar deviation and wrist flexion. These investigators popularized the term dart thrower’s arc to describe this conjoined wrist motion. Indeed, nearly all sporting activities, including pitching, racquet sports, fly fishing, javelin throw, batting, and golf also use the dart-thrower’s arc of wrist motion."


These motions along the Golden Axis are present in many human activities such as e.g. throwing darts or hammering nails. It shows us that this is the most effective and natural motion of the wrist -- not pure deviation or pure flexion/extension, but this coupling combination of , say, radial extension and ulnar flexion, a direction along a path of the dart thrower's wrist motion. A very interesting additional phenomenon is that the Golden Axis is the only one easily achieved and there is no other possibility to do it in another direction without the conscious help of pronation/supination movements of our forearms. Moving the wrist along the Golden Axis engages pronation and supination only in a slight necessary manner to perform the motion from maximal ulnar to maximal radial deviation. Moreover ,as beautifully described in the 'Solutions to Lengthen the Flat Spot. Part 4. Controlling Up and Down Movements: Automatic Shallowing via Sweetspot' article, further pronation/supination motions of forearms are just the automatic response for clubhead's CoG momentum.


The clubhead momentum created after the top during the downswing phase is huge (the head is relatively heavy because it is located at the end of a long shaft) not only ensuring a strong hit at the ball but also enough large to create balance problems of the whole body at the end of the swing. The lead wrist after impact bends at an angle (and not just purely radially deviates) which can be easily seen when we try to maximize its range of motion up which is totally in accordance with the slap-hinge release principles. Momentum vector is in line to the axis of maximum radial deviation enforced by the help of dorsi flexion. Further motion along the Golden Axis leads to absorb the momentum in the most effective way as the limit of the lead wrist's motion range is being reached in the most natural and neutral way possible -- no excessive or intentional supination/pronation of forearms which is equal to clubface stability, repeatability and consistency of strokes within the pattern. It even can be a primary goal to eliminate conscious pronation or supination; pronation and supination of forearms should occur totally unintentionally; the follow through without supination of the lead arm and pronation of the rear one requires to be preceeded by the slap-hinge release (or, at least, by some elements of the slap-hinge release, i.e. dorsal flexion of the lead wrist after impact) since without it the sweetspot would wander off plane or would require a very strong pivot and pure push release (not a good option for seniors and body-handicapperd golfers) or just an early swivel as in the heavily timing-dependent crossover release.

This is extremely important for draw patterns that require long flat spot and it is crucial to have stable clubface all the time there -- fades basing on slight OTT accross the ball have a very short flat spot, hence potential problems with clubface horizontal stability are minimal comparing to draws.


Mac O'Grady (and his later successors as e.g. Stack&Tilt promotors) strongly recommended more or less conscious "recocking" of the wrists in the follow through phase as a power leakage  and lack of post-impact balance antidotum. From 'The Stack and Tilt Swing' by M.Bennet and A.Plummer: " The unhinging of the wrists  on the downswing is a result of the club gaining dynamic weight and your right arm straightening, both of which exert a strong outward force and cause the wrists to unhinge. [...] Rehinging is an important action that better players often do instinctively but that less experienced golfers need to focus on. Just as the club got heavy on the downswing, causing your wrist to unhinge, it should feel heavy after impact, so your wrist rehinge to absorb this force. [...] If your body is left to brake the swing without help from the rehinging of your wrists, the club's momentum can pull you off balance."


While we can certainly agree to the latter we cannot follow the first part. "Recocking" phenomenon happens entirely unintentionally when the shoulder girdle is not rapidly opening through and after impact -- simply energy of the club and clubhead coming from the body and arms forces wrists to cock. We are sure though that Mac O'Grady knew that the lead wrist had to cock and hinge together to maximize the bend because it can be seen on his swing videos while watching very carefully what happens with his lead wrist. It is more the Golden Axis bend than typical slap-hinge release only or plain naive thinking about "recocking".
Moreover, it is crucial to remember about dividing the motion of the shoulder girdle from the torso as we described in detail in our last article from this year. Then the only thing we should do is to let the clubhead momentum guide the wrists to move up along the Golden Axis unintentionally. As we can see on the comparison below the effect is practically the same, no matter if one is a great pro with athletic body and one of the best swing motions in the history of golf and the other is just an old body-handicapped untrained weekend hacker who trusts the Golden Axis:


Seniors and body-handicapped golfers would bless the possibility of playing draws in a controlled manner without forcing their bodies to try to perform very tough moves, such as e.g. very strong pivot, straight arms after impact or maintaining tour-quality flexions and extensions of all joints. It is worth remembering that late Mr.Hogan preferred to sacrifice his overhuman accuracy as he couldn't score well with shortened discances; we all should consider the same attitude unless we want to suffer much worse scores or to play from women's tees. Here is a brief video summary dedicated to the Controlled Draw Pattern:


Tuesday, 9 February 2021

Further Important Facilitation for the Controlled Draw Pattern. Antithetic Body + Waggle.

We already know that the process of opening the shoulders has to be delayed in the Controlled Draw Pattern. Since the rotary motion is very prevailing for us humans taking into account the orientation of the motion while maximizing power unintentionally it is relatively very tough to control the amount of turning shoulders in relation to hips. While looking at the great drawing taken from one of Sir Henry Cotton's great books below let us deepen into the subject throughfully:


Human anatomy calls the body part between hips and shoulder girdle the thoracic/abdominal part. Together with pelvic region this part forms the so-called trunk or torso. Many golf theorists that were not anatomy-literate had difficulties in understanding that the thoracic part is much more merged to pelvis than to shoulders and, thus, often separated hips from what is above the waist. The consequence is that even if they understood the sequentiality of the motion well (i.e. they wanted hips turn before the shoulders during the downswing phase so to speak) they introduced unnecessary timing element even without knowing about it as they wanted their students to use their mid-torso together with shoulders and the effect was that there were three parts moving separately from each other. 

The answer is very simple and effective -- if we follow anatomy and its nuances we will merge the rotation of the pelvic area with the thoracic/abdominal part which will mean the whole torso (trunk) is going to move as an unit and can easily move in opposition to the shoulder girdle. Moreover, It is de facto easier to turn hips together with torso as they are less mobile as they cannot protract and retract (protraction and retraction occur only in two major regions of the body – the scapula and the mandible) hence the shoulder girdle can be more separated from the torso in its movement and it is able to move in a completely different orientation which is very helpful in our Controlled Draw Pattern, the more we talk invariably about the rear shoulder in depression and the lead one in protraction. 

Someone could ask why not to limit the motion of the hips and move them together with torso and shoulder girdle so that the timing issues can be eliminated. Unfortunately, the timing issues will paradoxially occur in a bigger scale as limiting the turning motion of the hips in the downswing is against the cascade of biokinetical events for a biped and would require lots of timing to control it; it is partially possible to convert its rotary motion orientation into linear one (as Stack and Tilt gurus suggest) but to do it just to ensure demanded motion of the shoulders while introducing a huge timing factor is just not wise; it is much better to create as big angular gap between pelvis and shoulder girdle as possible starting already at setup and letting the shoulders do their job unintentionally. Hence the big role of Antithetic Waggle concept that we are returning to a bit later in the article.


It is worth noting that this configuration of both shoulder joints (even including a pronounced axis tilt preset) can be noticed in the famous scene from 'The Greatest Game Ever Played' movie (above; we were lucky to find this fragment on You Tube) when the old Scottish pro Alec Campbell gives young Francis Ouimet a lesson before his US Open battle against Vardon and Ray and uses a stick making his lead shoulder protract while rear one depress and, simultaneously, closing his shoulder girdle in relation to his entire torso. What is extremely important, it all happens during the set-up phase, therefore, it is exactly what we always appreciate in our set-up-dependent swing patterns -- of course we can do it without anyone's help using procedures described in detail in previous articles.

Now we have to go back to one of much earlier articles of our site named 'The Antithetic Waggle'. We have concluded there that the waggle Hogan used could be named "the antithetic waggle". The word 'antithetic' means 'in diametrical opposition' which describe perfectly what is going on with the body. When one waggles the club back one should move the legs and hips into the opposite direction, like one wants to maintain symmetry in the sagittal plane. Now we want something more, i.e. diametrical opposition of the whole torso (hips and thoracic/abdominal part) against the shoulder girdle. 

Please look at Mr.Hogan here and pay close attention how his body goes in diametrical opposition to his arms:


Now associate this image with much more pronounced rotation of the whole torso anticlockwise against the protraction of the lead shoulder and the depression of the rear one with the arms waggling as in Mr.Hogan's case. It creates a pretty strong opposition, strong enough to rename the whole notion to "The Antithetic Body + Waggle" (when "+" means something deliberately added to the concept). Since this new procedure presets everything very well in this area of the body at setup we have nothing more to do in this section but proceed to start the motion right after. Our body is prepared to follow this achieved preset all the swing up to the impact phase letting us enter it with open torso and a little closed shoulders. Just exactly as on the following pic of Mac O'Grady playing his draw at impact:


By the way, we chose this swing to illustrate the idea as it is known that Mac plays a draw here (since it is described this way in You Tube channel where we found it). Besides O'Grady is a swing motion stylist who based his swing motion on Hogan and Snead which is a very good recommendation for us. What is also important and it is a link to this film Alec Campbell lesson -- if we take a look at Mac's address position it is very easy to "see" an invisible Campbell's stick making his lead shoulder protract resulting in making his lead arm appear over his rear one still at address and, simultaneously, making his rear shoulder depress (our Controlled Draw Pattern would ensure the address position even more similar to the impact one mainly thanks to the new Antithetic Body + Waggle procedure):


P.S. Although it does not belong to today's subject it is worth noticing that both O'Grady as well as the author of this blog used proper diagonality of his stance closing his feet line while letting his hips be slightly open at set up (his lead knee practically covered by his rear one and his lead hip not visible at all).


Wednesday, 13 May 2020

Gaining the Setup Automatism in the Controlled Draw Pattern. Finally a Bliss for RED Golfers.


The beauty in the Controlled Draw Pattern is that it can be finally a bliss for RED (Rear Eye Dominant) golfers -- yes, almost all things in golf favour either ambidextrous or LED (Lead Eye Dominant) players. Why ? Because golf is a side sport and the target is located at the lead side. For the first time we were lucky enough to invent a procedure that is extremely easy for RED majority of golfers, but first of all, introduces almost full automatism to the setup  procedure and, therefore, makes the Controlled Draw Pattern in the Senior Swing almost fully setup dependent motion.

As we already know, two very important features must be obtained before the swing motion begins -- increased spine tilt and closed shoulders line in relation to the target line. We can have both in the same time when creating it becomes second nature, but let us examine them step by step. Please take a serious look at the following diagrams and descriptions:


a. closed shoulders phase

we need to stand neutral in relation to the target while placing the ball exactly below the rear eye, then close the shoulder line and the whole torso in relation to the target line; we observe that by doing that the relation between the ball position and our eyes changes to a more centered one between the rear and the lead eye; we mentioned earlier also a valid hint for RED golfers who would like to depend the amount of shoulder girdle closure -- just try to look at the target binocularily "through your nose" with your rear eye


b. increased axis tilt phase

when we increase axis tilt more than the primarily achieved because of lower position of the rear hand on the grip the relation between the ball position and our eyes changes to almost under-the-lead-eye one; this is the position from which we start the motion; remember to use a more linear trigger in this case


As mentioned, both phases can be executed simultaneously and, moreover, we can easily learn to match the procedure to the club length and projected action ad hoc. When we need the flat spot to begin earlier (as e.g. in case of driver shots) the axis should be more increased, even to the position of the lead eye behind the ball. Conversely, when we need the flat spot to begin later (as e.g. in case of punch shots) the axis should remain as in the closed shoulders phase.
A very good idea is just trying to look what is below the ball's equator with the lead eye before the trigger compression phase while not letting lose this below-equator view with binocular vision after the body downswing shift until impact. Interestingly, the ball position in the downswing phase after the Horizontal Guillotine Effect practically returns to the rear eye over the ball while having the lead side wide and the rear side narrow (as explained in the last article), however in terms of binocular vision we can still see the dimples below equator till the end, i.e. losing the ball image which happens to all of us in various phases of the late downswing.


Last but not least, some nuances referring to the set-up procedure in the Controlled Draw Pattern.


First, it is worth mentioning that we are in a position to proceed the combined closed shoulders and increased tilt phases from the ground up using the old but gold procedure of presetting of the rear leg ankle and knee joints (please refer to the 'Setting the Swing Motion' article from the year 2010) aiming at anchoring our feet well and, therefore, at easing the WAB into SWAB phenomenon (please refer to the 'Solutions to Lengthen the Flat Spot. Part 3. Controlling Up and Down Movements: the Spine' article).
Both legs can be subdued to preset if it helps to anyone but, of course, the most important is the rear leg and its joints. The difference is that we now need to care about the senior and less agile golfers who tend to have weaker legs and, therefore, we need to create more effective shear forces, the more we do need as less flexed legs in the knees as possible (because of desirable limitations in the horizontal plane).
Take a look at the view from the above onto the rear foot -- while presetting the knee and ankle joints it is of crucial importance to open it slightly then raise the toes and rotate them to the outside creating the very firm outside border of the rear foot.


Secondly, it is crucial to control the lead side firmness (please refer to the 'Firm Lead Side in the Impact Zone' both articles) which might be easily done via the lead hip fixed extension procedure. The bigger the fixed extension is the tendency to excessive draws is limited and viceversa, without so firm the lead side it is much easier to turn in the impact zone and add some to the draw numbers. We would personally firm up the lead side for small push draws that tend to end at the right of the target while loosing it a bit for draws that end to the left of the target. An advanced player would also use it for programming the height of the ball flight as well as merge the amount of firmness with the length of the clubs.


Friday, 3 April 2020

The Controlled Draw Pattern in the Senior Swing. The Horizontal Guillotine Effect.


The Senior Swing Concept, as we have already know is being based on simplicity of movements that is so much required by seniors and body-handicapped golfers. There is no such a strong pivot present in the swing and less depth is prevailing. The whole motion is, therefore, more linear and shallow by default. Despite this we are capable to make the swing also automatic to a degree with help of some features described in detail in the Senior Swing series of articles including the YouTube educational video.
Unfortunately, a very negative consequence occurs -- namely, vanishing power and, thus, vanishing distance of hits which is very painful for less agile and older golfers.

Gardner Dickinson, one of the most famous Ben Hogan disciples, says in his great book titled 'Let'er Rip!': Never have I seen anyone control the ball as Hogan did during that period; it was beautiful to watch. A decent putter playing as he did from tee to green would have scored in the 50s almost every day [...]. One day he shot 61 and the longest putt he had for birdie, or eagle, was five feet. He could place his drives almost anywhere he chose [...]. The swing that produced Hogan's characteristic fade was developed when he was close to forty, and it continued into his mid-sixties. Slicing the ball as he did cost Ben a lot of yardage, and eventually he went back to drawing his shots. I asked him one day whether, if he had been able to control the draw, he would have played with a slice, and the answer was a firm "No".

The moral of the above story is very clear -- if only Hogan had been able to automate his pattern for draw the way he did it with the fade one -- he would have played draws as he would have gained some important extra distance for his shots. But he was not able to automate it the amount he wanted. Noone was able, let us be frank. Yet, when aging, Mr. Hogan decided to revert to draws as, which seems so symptomatic and sad in one, distance became more important for him than almost total automatism, repeatability and consistency of his fade swing. Honestly, I am 55 now and although I am not very short for my age and my imperfect body I noticed clearly my distances have shrunk considerably recently, especially after converting to my senior swing pattern.

The beautiful coincidence is that it is relatively very easy to control small push draws in the very pattern without any further timing-dependent modifications. We would even say that draws match the pattern better than fades (or at least almost straight delicate pushes). Moreover, we should not be afraid of hitting the ball fat (so typical with the desire to draw the ball) since obtaining a long flat spot even before the ball is not a mystery any more for us. As we know we need closed shoulders and increased spine tilt already at setup and then a limited pivot with depressed rear shoulder and then a linear trigger compression phase. We do not need to change anything after that, just to follow the trigger and swing on the outside-to-outside basis (please refer to the 'Bow Tie Concept' article).


The above diagramme shows from bird view the so-called Horizontal Guillotine Effect that is being required in simplification during the first part of the downswing from the top of the swing (left) up to entering the impact zone (right). The linear motion of the whole body (not only hips like in the Stack&Tilt pattern) is very easy, especially for RED golfers (this is another great feature as these golfers are in vast majority), and can happen without jeopardizing anything because of the increased axis tilt preset at address in the Senior Swing pattern that does not change during the motion. It is virtually impossible to enter the hitting area from the outside taking into account shifting this wedge-shaped body correctly and simultaneously knowing that we should not hit with anything below elbows since these body parts are for us the parts of the club system (please refer to the Automatic Shallowing via Sweetspot article). 

Now please look at this diagramme below:


If we enter the hitting area with such a wedge, so to speak, our lead side appears to be much "wider" than the rear one in the coronal plane which is great as it prevents from throwing the rear side to the outside. This "width" is also present because of our lead humerus sticking out in front of the torso (while the rear humerus stays rather behind the torso). We only cannot let the rear "thin" side to "widen" prematurely, as this leads to numerous problems with the execution of the swing. The best feeling that accompanies this idea is not only to try to hit with humera close to the body but also to "hit with the rear scapula". It is also very interesting for all rear side dominant players that, again, are in the vast majority. Powerful, yet still effortless, shots from the inside are the desirable results.


P.S. There are no pure examples of the Horizontal Guillotine Effect in tour swings of course, however, some great swings (especially of greats in their older days) show the linear motion of their shoulder girdle together with their head after transition; while looking at the below gifs simply imagine less rotation aiming at delivering closed shoulders line to the hitting area (without concentrating on head dips):


Thursday, 21 November 2019

Solutions to Lengthen the Flat Spot. Part 5. Controlling Up and Down Movements: Little Help from Physics and Anatomy.


We asked the following questions in the previous article: what should we do to let the sweetspot guide our swings through the MOI axis automatically ? And how to make our forearms and wrists be parts of our clubs ? In order to find the answers we need to take into account a little of biophysics. Prof. Theodore P. Jorgensen, in his excellent book titled "The Physics od Golf", explains to golfers how to use angular acceleration and torques to their benefit on base of the experiments illustrated below (the stick symbolizes golfer's lead arm):


We can see that if the lead shoulder pulls the arm parallelly there will be no lead arm rotation; if arm is angled to the vector of pulling force, the rotation will happen.


The difference between Prof. Jorgensen's examples and our studies is since we would like to have both humera as parts of the body while both forearms be a part of the club. It should be pointed out that forearm rotation is much easier achievable than the rotation of the whole arm which is very important in view of a subtle difference between club's MOI axis and shaft. Such a scenario is possible only when arms are not extended or hyperextended. It is easy to see this making a simple excercise: extend fully your arm and rotate it -- the whole arm (humerus and forearm) rotates; when it is not extended (only a little not extended is enough) -- only the forearm rotates (we wrote about this phenomenon in the first series of our articles in 2010, see: 'The Arms'). Let us see now our diagramme based on the Prof. Jorgensen's examples below:


It is to be pointed out that the sense of rotation  will be always enhanced by the fact that the club rotated around its MOI axis and not around the shaft. Automation is full and the only one condition is not to allow the arms (especially the left one) extend fully at address and during the first part of the backswing. The lead arm will straighten unintentionally later on with the help of lack of centripetal force and, finally, with the help of gravity.
Nevertheless, there is one more important problem, namely the wrist joint that somehow links the forearm to the club. If  wrists are like the chain between two nunchaku sticks it would be perfect. Alas, it is not despite the fact that wrist joints are very mobile ones. The point is to allow its full mobility come into force.

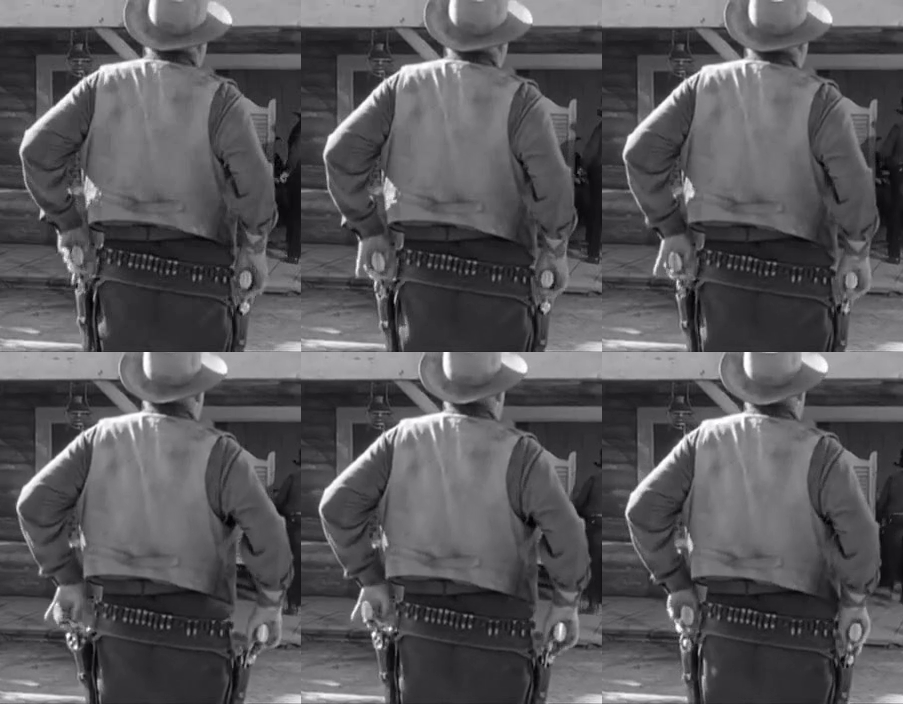
The best solution for having both allowing the automation of forearm rotation as well as full mobility of the wrists I could ever find is a firm but loose grip. You might remember both articles referring to building automatically a very firm grip (i.e. 'The Tale of a Left-Handed Knight and a Lady with Fan' and 'Melting Two Hands into One. Rear Hand Joins the Puzzle' from the year 2014) -- they are very valid always. Tightening the grip by fingers' action has a very big negative effect on both cases. However, it is antisubconscious to let the grip be very loose as our subconscious mind does not want to let the club go out of our hands, therfore, we need to use a smart trick here. Please take a look on the following GIF (taken from one of my favourite Western movies titled "The Fastest Gun Alive"):


Put a special attention to how the Vinnie Harold character (played by the great actor Broderick Crawford) treat his guns before a forthcoming duel. He pronates both forearms to the inside using his thumbs in order to minimalize the friction between his guns and holsters and avoiding any potential blocking). Surprisingly, this action is in a great accordance with the process of forming the Bio-K grip (merging a strong lead and a weak rear hand position); it sort of tightens the grip several times before loosing the tightness. Watch closely again in a slow motion:


The above method works for us perfectly, but it can be one of quite a few ones. The most important goal is to ensure maximal loosenes of wrists while maintaining stability of gripping the club lightly.
If we are able to fulfill this goal everything become automatic -- forearms act involuntarily following the club rotating around its MOI axis and, in consequence, helping vividly in creating a repeatable shallow arc of the sweetspot that we want to achieve.

And here is a small video reassuming the whole subject: