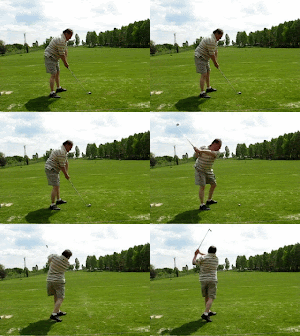
The beauty in the Controlled Draw Pattern is that it can be finally a bliss for RED (Rear Eye Dominant) golfers -- yes, almost all things in golf favour either ambidextrous or LED (Lead Eye Dominant) players. Why ? Because golf is a side sport and the target is located at the lead side. For the first time we were lucky enough to invent a procedure that is extremely easy for RED majority of golfers, but first of all, introduces almost full automatism to the setup procedure and, therefore, makes the Controlled Draw Pattern in the Senior Swing almost fully setup dependent motion.
As we already know, two very important features must be obtained before the swing motion begins -- increased spine tilt and closed shoulders line in relation to the target line. We can have both in the same time when creating it becomes second nature, but let us examine them step by step. Please take a serious look at the following diagrams and descriptions:
a. closed shoulders phase
we need to stand neutral in relation to the target while placing the ball exactly below the rear eye, then close the shoulder line and the whole torso in relation to the target line; we observe that by doing that the relation between the ball position and our eyes changes to a more centered one between the rear and the lead eye; we mentioned earlier also a valid hint for RED golfers who would like to depend the amount of shoulder girdle closure -- just try to look at the target binocularily "through your nose" with your rear eye
b. increased axis tilt phase
when we increase axis tilt more than the primarily achieved because of lower position of the rear hand on the grip the relation between the ball position and our eyes changes to almost under-the-lead-eye one; this is the position from which we start the motion; remember to use a more linear trigger in this case
As mentioned, both phases can be executed simultaneously and, moreover, we can easily learn to match the procedure to the club length and projected action ad hoc. When we need the flat spot to begin earlier (as e.g. in case of driver shots) the axis should be more increased, even to the position of the lead eye behind the ball. Conversely, when we need the flat spot to begin later (as e.g. in case of punch shots) the axis should remain as in the closed shoulders phase.
A very good idea is just trying to look what is below the ball's equator with the lead eye before the trigger compression phase while not letting lose this below-equator view with binocular vision after the body downswing shift until impact. Interestingly, the ball position in the downswing phase after the Horizontal Guillotine Effect practically returns to the rear eye over the ball while having the lead side wide and the rear side narrow (as explained in the last article), however in terms of binocular vision we can still see the dimples below equator till the end, i.e. losing the ball image which happens to all of us in various phases of the late downswing.
Last but not least, some nuances referring to the set-up procedure in the Controlled Draw Pattern.
First, it is worth mentioning that we are in a position to proceed the combined closed shoulders and increased tilt phases from the ground up using the old but gold procedure of presetting of the rear leg ankle and knee joints (please refer to the 'Setting the Swing Motion' article from the year 2010) aiming at anchoring our feet well and, therefore, at easing the WAB into SWAB phenomenon (please refer to the 'Solutions to Lengthen the Flat Spot. Part 3. Controlling Up and Down Movements: the Spine' article).
Both legs can be subdued to preset if it helps to anyone but, of course, the most important is the rear leg and its joints. The difference is that we now need to care about the senior and less agile golfers who tend to have weaker legs and, therefore, we need to create more effective shear forces, the more we do need as less flexed legs in the knees as possible (because of desirable limitations in the horizontal plane).
Take a look at the view from the above onto the rear foot -- while presetting the knee and ankle joints it is of crucial importance to open it slightly then raise the toes and rotate them to the outside creating the very firm outside border of the rear foot.
Secondly, it is crucial to control the lead side firmness (please refer to the 'Firm Lead Side in the Impact Zone' both articles) which might be easily done via the lead hip fixed extension procedure. The bigger the fixed extension is the tendency to excessive draws is limited and viceversa, without so firm the lead side it is much easier to turn in the impact zone and add some to the draw numbers. We would personally firm up the lead side for small push draws that tend to end at the right of the target while loosing it a bit for draws that end to the left of the target. An advanced player would also use it for programming the height of the ball flight as well as merge the amount of firmness with the length of the clubs.


